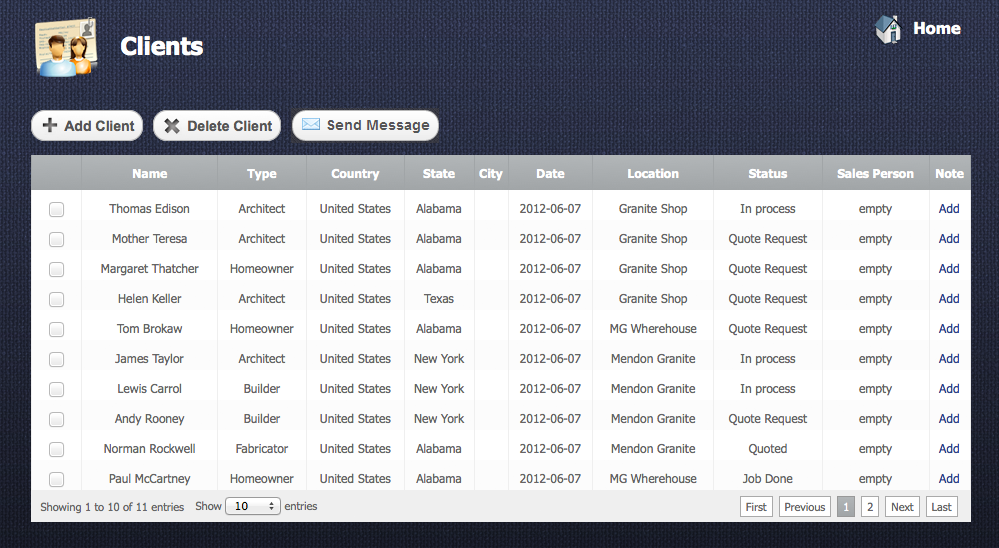
Clients
With the Clients section you may create and edit the list of your clients. Add and remove them from the table if necessary.
Adding Clients
Return to topTo add a new client you have to click on “Add Client” button ![]() after that new client window will appear.
after that new client window will appear.
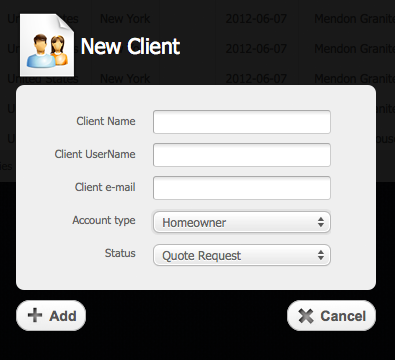
Here you should type next data:
- Client Name – name of the client
- Client Type – this is type of client e.g. Homeowner, Architect, Builder, etc.
- Client Login – this is a login which client can use to get an access to your price list.
- Client e-mail – e-mail address of the client
- Status – this is status of the client e.g. Quoted, In Process, Job Done, etc.
Working With Table
Return to topAdded clients appear in the table of clients.To open detailed information about one, you have to click on some row from the table. To sort data according to each column of the table, you just have to click on some column's name. If you click on the same column once again the sort direction will be changed.
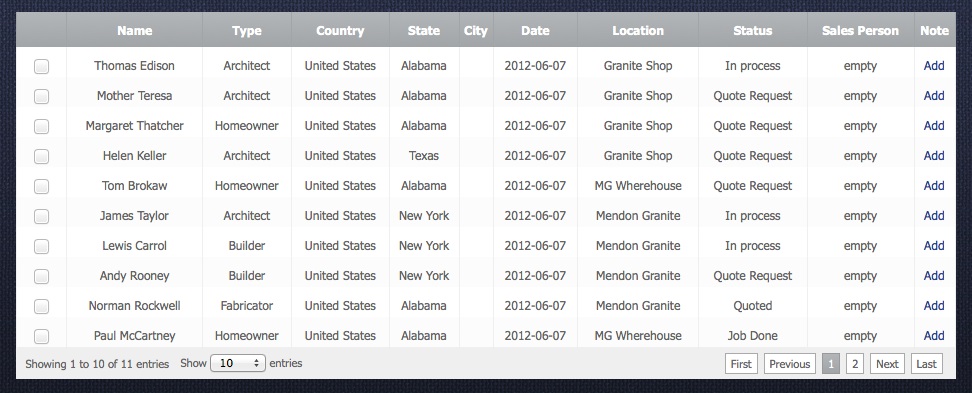
Here you can keep next information:
- Client Name – name of the client
- Client Type – this is type of the client e.g. Homeowner, Architect, Builder, etc.
- Status – this is status of the client e.g. Quoted, In Process, Job Done, etc.
- Login, Password – with this login and password your client can get an access to your price list.
- Location – This is name of the shop where the client buys products and services
- Sales Person – this is a sales person's name who serves the client
- Price Level – each product or service has six price levels here you can setup one of the price levels to the client.
To save the data you have to click on “Save Changes” button.
Deleting Clients
Return to topTo delete some client you should select a checkbox ![]() opposite the client and then click on “Delete Client” button
opposite the client and then click on “Delete Client” button ![]() . Please be careful, because after that you will not be able to renew the deleted client.
. Please be careful, because after that you will not be able to renew the deleted client.