Units in Stock
Here you can keep important information regarding your units. In the table you can see summary of what is in your inventory.
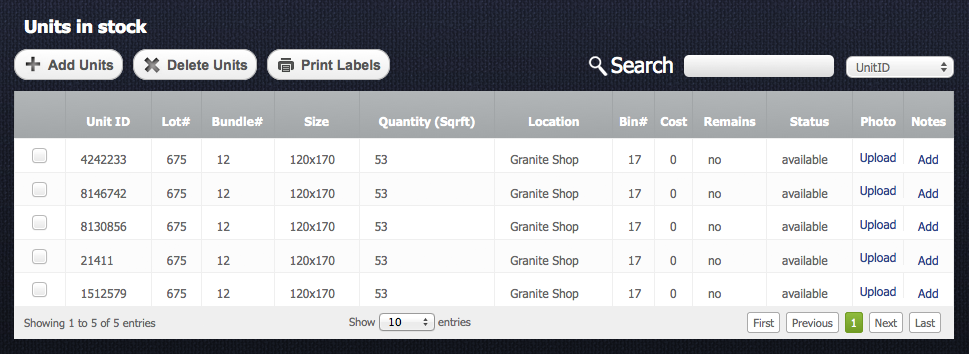
Short description of the table columns:
- Unit ID – is identity number (serial number) of the unit that is unique. This number is generated automatically.
- Lot# & Bundle# - characteristics of the unit.
- Size - this is dimention of the unit which is written in the next format: width x height.
- Quantity – it shows quantity of square feet in one unit. Also there can be other unit of measurement as well. The unit of measurement is setting up while creating a category.
- Location – is a shop or warehouse name where the unit is located (In the EasyStoneShop you can create several locations)
- Bin# - name of the area where the unit is lying.
- Cost – the unit's cost.
- Remains – it can have two values: YES or NO. It’s used for stone remains tracking.
- Status – each unit can have several statuses like "available", "hold", "allocated" and "sold".
- Photo – in this column you can upload photos of each unit
- Notes – here you can add notes to each unit
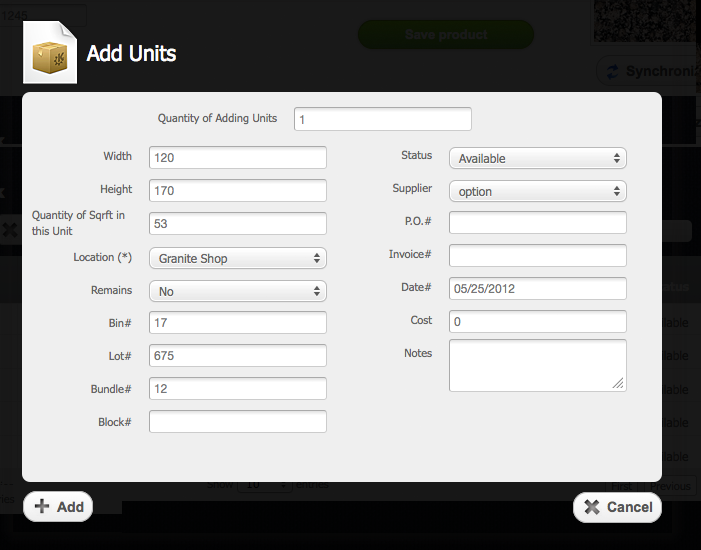
Adding Unit
Return to topBefore you add units, please make sure you clicked on "Save product" buttonm otherwise data about your units won't be saved. In order to add units to some product you need to click on “Add Units” button![]() . You can add several units at one time; quantity of added units can be entered in the corresponding field. After you press “Add” button
. You can add several units at one time; quantity of added units can be entered in the corresponding field. After you press “Add” button![]() several units will be added with the same options. The difference between them will be just in Unit ID number. This number is unique for each unit.
several units will be added with the same options. The difference between them will be just in Unit ID number. This number is unique for each unit.
Deleting Units
Return to topTo delete some unit or units you should select a checkbox ![]() opposite the unit and then click on “Delete Units” button
opposite the unit and then click on “Delete Units” button ![]() . Please be careful, because after that you will not be able to renew the deleted units.
. Please be careful, because after that you will not be able to renew the deleted units.
Editing Unit
Return to topTo edit a unit you need to click on this unit in the table. After that "Unit Details" window will appear.
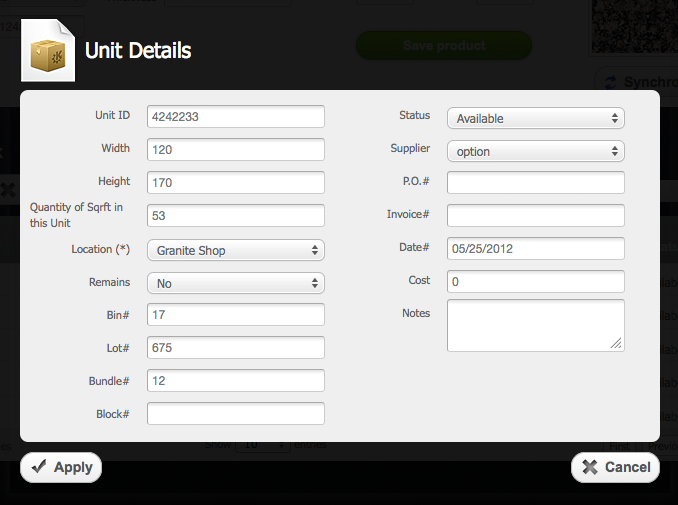
When you finish with the changes you must click on “Apply” button ![]() to save the changes or click on “Cancel” button
to save the changes or click on “Cancel” button ![]() to cancel everything.
to cancel everything.
Adding Notes
Return to topEach unit can contain notes. To add notes to some unit you need to click on “Add” link in the Notes column.
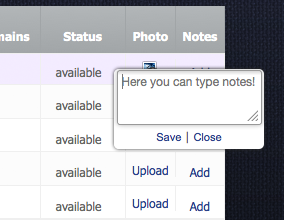
After that small window will appear. There you can type the note. To save note you should click on “Save” link. If note was added you will see a note icon ![]() .
Also you can add note when you edit or add some unit.
.
Also you can add note when you edit or add some unit.
Uploading Unit’s Photo
Return to topYou can upload a photo for each unit. In order to do it you should click on “Upload” in the “Photo” column. After you do it a file browser will appear. There you should select a photo. If you have done everything correct you will see a photo icon ![]() . If you click on the icon you will see the uploaded photo.
. If you click on the icon you will see the uploaded photo.
Here you can delete the photo or update it by uploading another one.
Printing Labels
Return to topTo print labels you need to select check boxes opposite the units and then click on “Print Labels” button ![]() . The most important information regarding the unit will be included in to the printed label.
. The most important information regarding the unit will be included in to the printed label.